
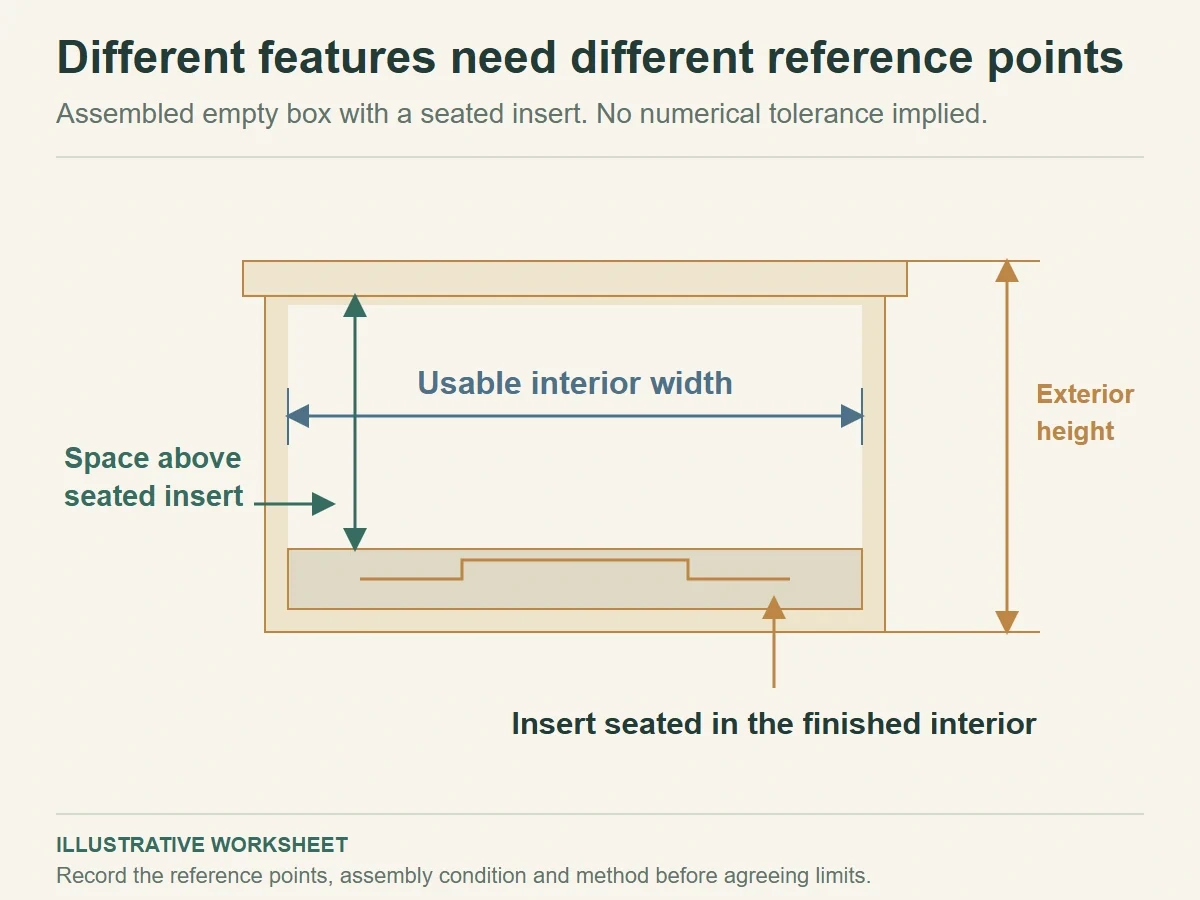
Agree packaging dimensions by defining what is measured, where measurement starts, the package condition and the method used for acceptance. Record the target and project-specific acceptance limits for each critical feature with the responsible parties. Then check the named feature using that method, alongside a functional fit check with the intended product and complete packaging assembly.
Two people can report different dimensions while examining the same box. One measures outside the wrapped walls; another measures the available space above the insert. A dimension becomes useful when both know its reference points and the condition of the package they are measuring.
Give every dimension a location and a purpose
Separate the product measurements, finished box interior, finished box exterior and insert features. Label each on a drawing or marked photograph. A bare sequence such as 120 by 90 by 40 leaves too much open when nobody has said which space it describes.
Start with the dimensions that affect use. A pendant’s raised setting needs lid clearance. A candle jar needs a cavity that supports the intended arrangement. A shipping carton needs an exterior size that the relevant handling or packing process can evaluate.
Define the starting reference, often called the datum, in plain language. “From the inside left wall to the inside right wall, below the lining fold” gives both reviewers the same location. An insert cavity may need a different reference, such as its widest usable opening at a marked level.
Mark the measurement direction too. Depth from the box rim to the base differs from available space above an installed insert. If the product occupies an angled or offset position, add a view that shows how it sits during the check.
Use the jewelry insert measurements when building product-specific reference points. The agreement developed here controls how those points are measured and how the result is judged.
For a flexible part, decide whether the dimension is measured freely resting or held in a stated position. Pulling a pouch flat or pressing a cavity edge can change the reading. Write the agreed condition where the dimension appears so it travels with the drawing.
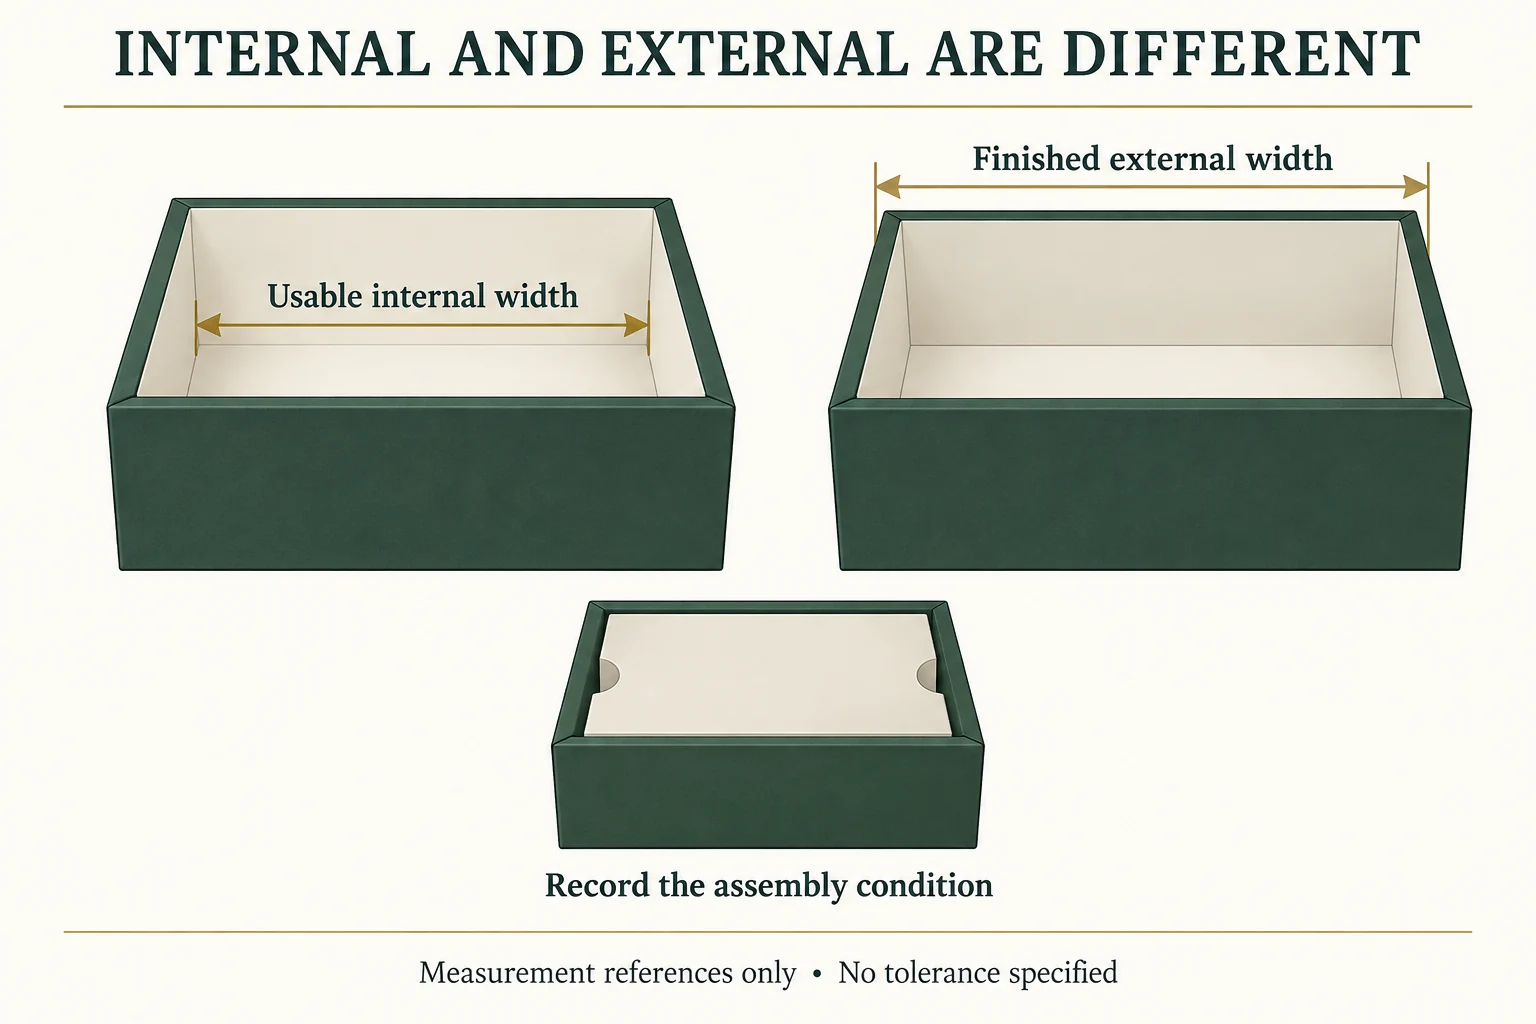
Specify the condition before setting a limit
Record whether the box is flat, assembled, empty or packed. Include the insert, lining and closure where they affect the available space. Use the intended components and note their version identifiers when you evaluate a complete assembly.
Choose a measuring tool appropriate to the feature and agree how to use it. A ruler, caliper or fixture can answer different questions. Flexible walls may move under pressure, so the method should describe contact and support rather than leave them to individual habit.
Discuss any preparation or environmental conditions that matter to the proposed material. The supplier should identify relevant conditions for its construction. Record them as part of the method instead of adopting a generic conditioning rule for every package.
NIST’s measurement process guidance treats measurement as a process to be characterised. This worksheet applies that idea to a buyer’s agreement; the packaging dimensions and acceptance limits must come from the particular project.
The illustrative entries below describe questions to settle. They deliberately leave numeric limits open until the parties have agreed them.
Swipe the table to view all fields.
| Feature | Reference and condition | Method to agree | Acceptance field |
|---|---|---|---|
| Usable interior width | Between marked inside walls, assembled | Tool and contact points identified | Target, lower limit and upper limit |
| Space above insert | Insert seated, box closed as specified | Agreed clearance check | Required clearance and pass method |
| Insert cavity | Marked level, insert resting freely | Tool pressure and orientation stated | Cavity limits and fit result |
| Exterior height | Complete empty box, closure seated | Flat support surface and tool stated | Permitted finished height range |
Keep dimensional acceptance and product fit connected
A dimensional reading and a fit trial answer related questions. The reading checks a defined feature; the trial shows how the actual contents behave in that assembly. Record both where a package must hold, present or release a product in a particular way.
For an illustrative pendant box, the interior height may meet the agreed range while the product sits higher than expected on the insert. The next investigation concerns the full arrangement: insert seating, pendant orientation, accessory position and lid clearance. Simply widening the height range would hide the unresolved interaction.
The reverse can also occur. One sample may fit the product well while a critical dimension falls outside the agreement. Record the result and ask the responsible parties to decide whether the specification or sample needs correction. A useful sample shouldn’t silently rewrite the limits.
Use the sample approval checks to record opening, contact, removal and complete pack-out observations alongside the dimension sheet. Give each result its sample identifier and date so the two records can be matched.
Before production, agree which features are critical and how the acceptance check will be applied. State who measures, which records will be provided and how a disputed result will be rechecked. Lot inspection and the number of pieces examined need their own agreement where relevant.
Record a reading without inventing an acceptance limit
Consider a purely hypothetical interior-width record for drawing D-02, sample S-01. The target is 60.0 mm between two marked inner wall faces with the empty box assembled. An invented caliper reading of 60.3 mm is an observation. If the parties have not agreed lower and upper acceptance limits, the sheet cannot label it dimensionally accepted or rejected.
Scroll horizontally if columns extend beyond the view.
| Field | Illustrative entry | Resulting action |
|---|---|---|
| Feature | F-01 usable interior width, D-02 | Mark inner left and right wall faces at the agreed level |
| Condition | S-01 assembled empty; named lining included | Keep condition and reference photo with reading |
| Method | Named caliper and agreed contact method to confirm | Do not compare with a ruler reading taken outside the walls |
| Target and reading | 60.0 mm target; 60.3 mm invented reading | Retain both; no tolerance inferred from the difference |
| Limits and disposition | Lower/upper limits not agreed | Acceptance pending; arrange method and limits with responsible parties |
A second reading of 64.0 mm taken across the exterior is a different feature, not evidence that the internal result drifted by 3.7 mm. Ask for the correct faces before comparing readings. The actual product fit still needs its own assembled check: the interior width can be recorded correctly while an insert or raised setting creates a separate interference.
Resolve conflicting readings with the recorded method
When two measurements disagree, compare the method before requesting a change. Confirm that both people used the same drawing revision, reference points, tool, assembly condition and components. A photograph of the measuring position can reveal a different interpretation quickly.
Retake the reading under the agreed method and record the new result beside the first one. If the result still differs, keep both records and ask for a joint review. Avoid averaging numbers that may describe different locations or conditions.
Update the drawing and measurement sheet together when a limit or method changes. Identify the approval owner and effective revision. A revised tolerance in an email should appear in the specification that the supplier and buyer use next.
For an early Packrivo packaging inquiry, bring the product dimensions, marked reference views and the acceptance fields still to agree. That gives the discussion a practical starting point: a named feature, a repeatable way to check it and a clear decision about the result.
Keep the current record with the project brief
Download the dimension method record CSV. It contains field definitions, clearly hypothetical examples and a blank actual-project row. Replace invented values with your own supported records; keep unknown fields open.
Packrivo coordinates packaging sourcing and project questions with independent suppliers. The worksheet is a discussion aid, not a confirmed quotation, manufacturing promise or sample approval. The published starting MOQ is 500 pieces per product/design; actual component, design and commercial scope require confirmation.
Source scope: NIST supports treating measurement as a characterized process; invented readings do not supply project tolerances or acceptance. Public references checked 16 October 2026. All new illustrations are AI-assisted concepts. No real customer, test, shipment, stock, savings or production outcome is represented.