
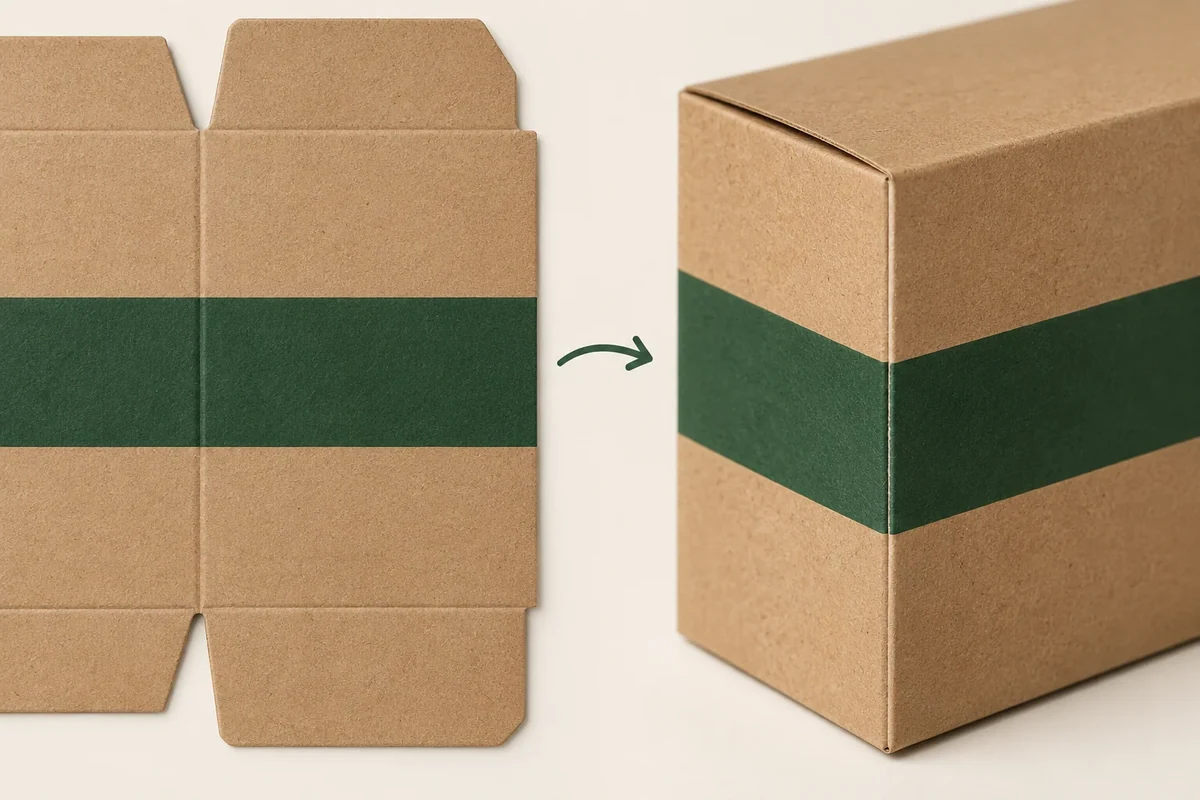
Review print near a fold on the formed sample as well as the flat proof. Name the crease, photograph the same area before and after folding, and record the material and artwork revision. A visible line needs a location and comparison record before a supplier can discuss its cause or a change.
A flat artwork proof can look acceptable while the reader’s view changes after the carton takes shape. Keep the print observation distinct from a technical diagnosis. The buyer can document what appeared; the converter needs the proposed material and process to assess why.
Choose the exact printed crease to review
Identify the fold on the drawing and name the artwork crossing it. State whether it contains a solid background, fine line, small copy or another defined element. Keep the description specific enough to find the same area on a later revision.
Holmen’s creasing guidance describes creasing, surface cracking and the need to match the operation/tool geometry to the paperboard. This supports a converter review with identified conditions. It doesn’t make a buyer photograph a reliable diagnosis of moisture, tooling or coating.
Start from the actual material and artwork proposal. A plain structural mock-up can answer a fold-location question, but it won’t show how the proposed printed surface appears at that fold.
The print finishes checklist handles broader process choices. This method focuses on a paired observation of one printed crease after forming.
Make the photo pair comparable
Photograph the area flat before the agreed forming action. Keep the whole crease visible in one view and capture a closer view if needed. Use a consistent light and angle that lets a reviewer locate the printed element.
Form the sample according to the proposed instruction, then photograph the same location. Record whether the fold is partially or fully formed. Avoid repeatedly bending it for the photo unless repeated opening is part of the named review scope.
Keep the original images. An edited close-up may help point to a location, but retain the wider view and name the edit. Do not enhance contrast until a faint mark looks like a different physical condition.
Describe the visible result in plain terms: a light line through the green background, broken detail near one edge, or a mark visible only from a stated angle. Record ‘no visible change in this view’ when that is all the photo shows.
Use a flat-to-formed observation record
One row should identify one area on one sample. This keeps different folds or different material versions from becoming a single complaint.
| Field | Entry to keep | Reason |
|---|---|---|
| Location | Crease ID and adjoining panels | Find the same fold on the drawing |
| Artwork revision and element crossing crease | Identify the affected visual area | |
| Material | Board, caliper and surface proposal | Connect observation to the sample |
| Action | Forming instruction and stage | Describe what occurred before the mark |
| Image pair | Flat and formed photo IDs | Compare like locations |
| Observation | Visible line, break or no visible change | Separate appearance from diagnosis |
| Next response | Supplier explanation and proposed revision | Keep the decision traceable |
Ask the supplier whether another sample is needed to assess the issue. Record the response and any changed material, artwork position or converting proposal.
Follow a hypothetical dark lid fold
Suppose a brand places a dark green printed band across a hinged lid fold. On the flat sample the band appears continuous. After the intended forming action, the reviewer observes a light line near one end.
The buyer records the lid crease ID, material and artwork versions, then sends the flat and formed pair. The enquiry asks the converter to assess the proposed construction and recommend the next evidence. It doesn’t instruct the converter to change a machine setting based on the photograph.
If a revised sample moves the printed band away from the fold, record that artwork change. If the band stays but the material or process changes, record those changes instead. Compare the relevant revision; don’t mix the best photo from each sample into one apparent approval.
Keep appearance decisions separate from causes
For the hypothetical green lid band, an observation can read: ‘Light line visible near the rear end of C1 after the stated forming action.’ The cause field stays ‘awaiting converter review’. Keeping those two statements separate lets the buyer document a concern without claiming expertise the photograph doesn’t provide.
Record the intended customer view as another field. A mark visible in a close macro view may be reviewed differently from one visible in the normal opening position. Agree which view controls the appearance decision rather than changing the photo distance until the mark disappears.
The outgoing request should include the wider location view, flat close view and formed close view. Ask the supplier which material or converting information is needed to assess the named crease. If the response proposes a revised sample, identify what is expected to change before comparing it.
Keep the old and revised observations in separate records. A new sample with a different printed band can answer an artwork-location question, while leaving the earlier crease construction unexplained. Mark the scope actually accepted and preserve any unresolved technical question instead of giving the entire print process an undifferentiated pass.
Send a located observation, not a vague finish request
Bring the image pair and record to your packaging enquiry. Mark any unconfirmed cause as open. The next useful step is a supplier response tied to the same crease and proposal, followed by a review of the revised formed sample.
Compare an artwork correction with a construction revision separately
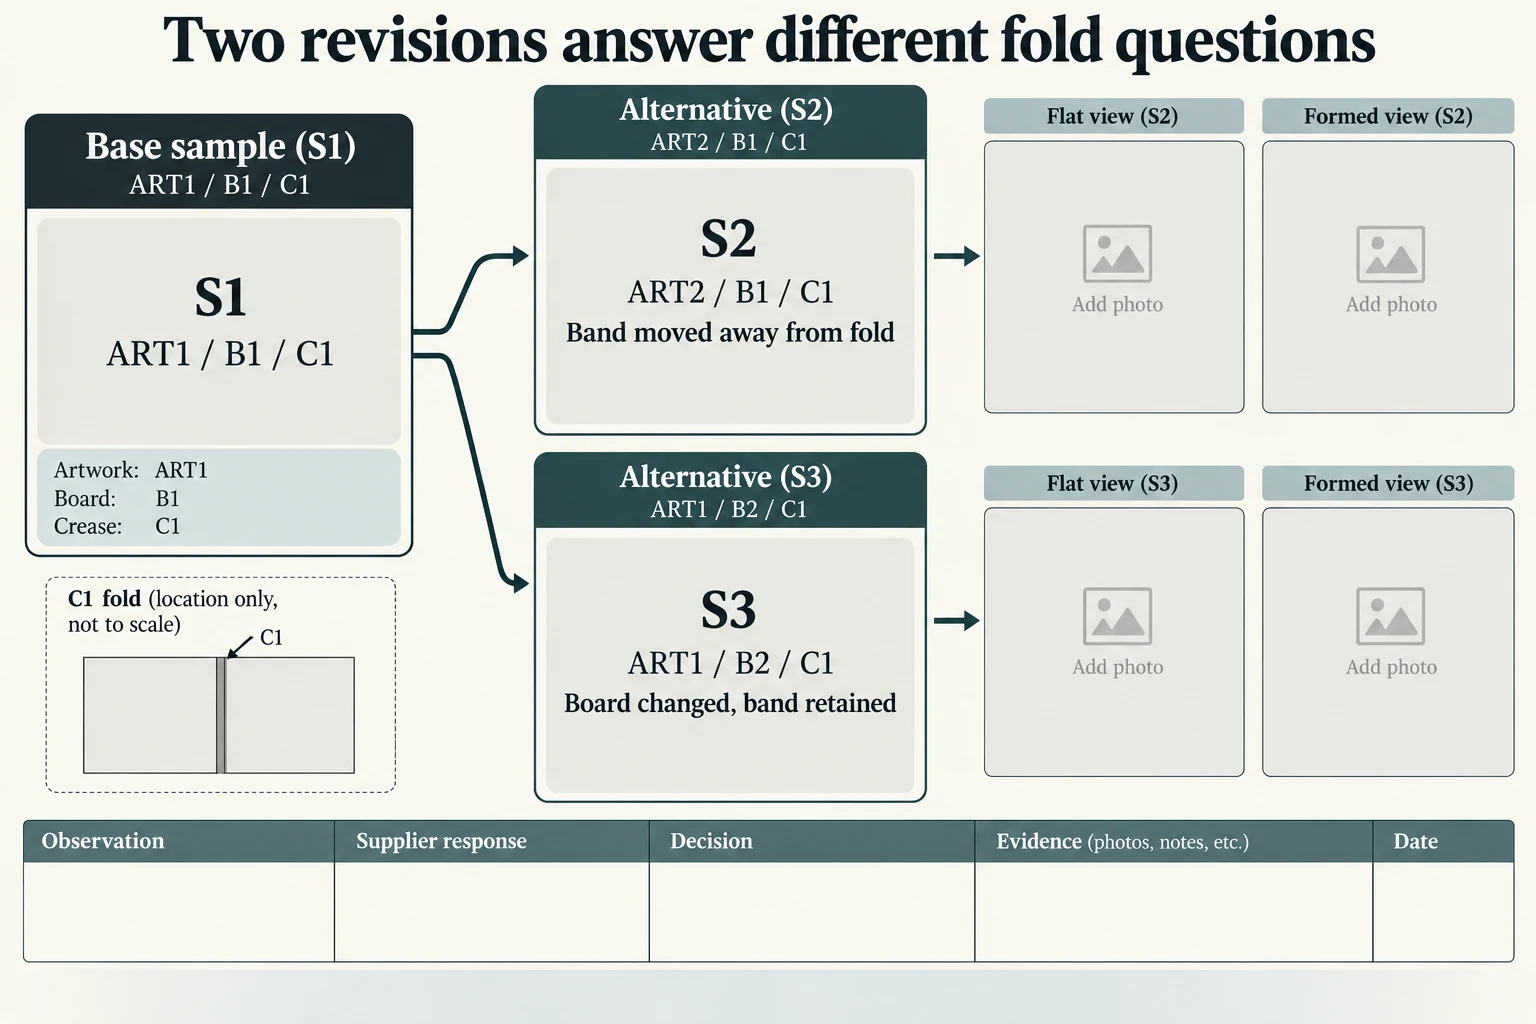
Build two alternative requests from the original fictional green-band issue. Give the baseline the explicit identity S1/ART1/B1/C1. S2 proposes ART2 on the same B1 with the band moved away from the fold. S3 retains ART1's crossing band but proposes B2. Neither candidate has been made or observed in this example. Their separate flat, formed and customer-view evidence fields remain blank.
Scroll horizontally if columns extend beyond the view.
| Hypothetical configuration | Named object | Relationship | Input or next scope |
|---|---|---|---|
| S2 | S2 | uses artwork | ART2 |
| S2 | S2 | uses board | B1 |
| S3 | S3 | uses artwork | ART1 |
| S3 | S3 | uses board | B2 |
The artwork alternative can answer whether the newly placed band achieves the intended presentation. Even a satisfactory S2 appearance would not explain why the original band developed a light line at C1. The material alternative asks a different question: how does the same located artwork appear on the offered revised construction? A comparison that quietly moves the band and changes the board at once cannot isolate either difference from those records.
Send each proposal with the fields it changes and the fields it retains. For S2, ask the artwork owner to identify the new band location, then ask the converter which formed evidence remains necessary. For S3, obtain the actual material and converting proposal before comparing the same crease. If tooling, finish or forming action also changes, add those identities rather than calling it a board-only comparison.
Review the original wide location, flat close and formed close views together with the intended customer view. The CSV preserves the original hypothetical continuous-band and light-line descriptions as fictional observations, not actual findings. New candidate observations, technical explanation, decision and evidence stay empty. Select the presentation or further investigation actually supported; do not combine a flat view from one candidate with a formed view from another into an apparent approval.
Download the fold line print cracking review record (.csv). It includes the original table fields and scenarios alongside the added relationships. HYPOTHETICAL rows are editorial examples or required review scopes, not actual records. Actual quantity, configuration, component and file identities, materials, process, specification, copy, method, condition, observation, owner, decision, evidence and dates are blank. ACTUAL_BLANK is a separate empty starting row; enter permitted project evidence before using an actual record. A blank means unknown.
Use the Packaging Sample Revisions: Compare Versions Before Approval for its separate question. Use the Packaging Print Finishes: A Supplier Brief Checklist for its separate question.
References apply to the materials, processes or guidance named in each source. Worked configurations and dimensions are teaching examples, not tested specifications or production limits. Use the project’s material specification, drawing and formed sample for approval.
Discuss this packaging specification with Packrivo. We coordinate independent suppliers. MOQ: 500 pieces per product/design; illustrative quantities are not production offers. Confirm materials, samples, price and timing for your project.