
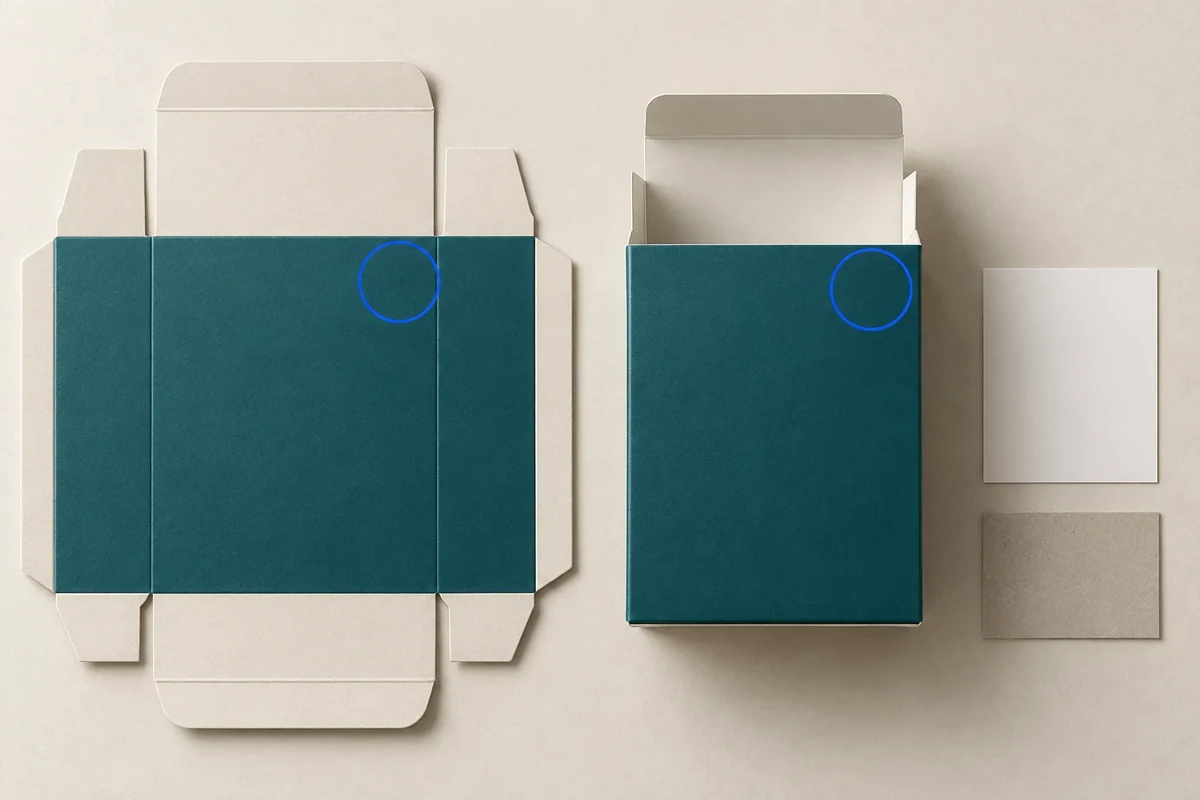
Review a large solid print area as a named panel with a recorded substrate, process and evidence stage. Keep the flat proof and converted sample linked, then describe the visible difference under agreed conditions. The next printer question should locate the appearance issue instead of asking for generally better color.
Give the solid area a boundary and a process
Fogra’s sheet-fed offset research examines substrate properties and solid-tone behavior under controlled printing conditions. It supports recording the paper and process with the printed result. It does not supply a universal ink setting or an acceptance value for your gift box.
Name the large face and its solid-color object on the current drawing. Mark its boundary, adjacent artwork and any finishing layer. Record whether the proposed printer uses a spot color, a process-color build or another confirmed arrangement. Keep the chosen physical reference separate from those production fields.
Specify which face is being reviewed after converting. A viewing angle can change when a panel is formed into a box, so retain the panel ID and orientation. Keep fold cracking and exposed-cut-edge questions in their own records; this tool focuses on the appearance of the named solid area.
Identify what each proof can show
The Glenroy print guidelines distinguish proof purposes and describe process-specific print considerations such as plate breaks. Use that as an example of why the actual printer should define the evidence supplied. Its flexographic details cannot be transferred automatically to an offset or digital proposal.
Ask whether a file preview, flat printed proof or formed sample is being sent. Record the substrate and finish state for that evidence. A sample printed on another stock remains useful for the questions it actually answers, but its substitution should stay visible in the comparison.
Write observations in plain, located terms: uneven appearance across panel F1, a line visible at a named boundary or a difference between two areas under the same lighting. Attach the photograph and viewing conditions. Avoid diagnosing an ink or press cause before the printer has assessed the evidence.
Use a large-solid panel observation record
This original Packrivo worksheet links an appearance observation to the actual panel and next response.
| Field | Hypothetical entry | What remains to confirm |
|---|---|---|
| Panel/object | Front face F1, solid object A1 | Current artwork and drawing IDs |
| Print proposal | Selected printer’s process and color build | Named grade and print setup scope |
| Flat evidence | Proof FP1 on the stated stock | Whether appearance or only position is reviewed |
| Converted evidence | Formed sample S1, same face orientation | Final finish and contents state |
| Observation | Visible uneven area near the right side of F1 | Printer’s assessment of located evidence |
| Decision | Request another appearance proof for F1 | Response owner and accepted reference |
Compare an illustrative flat and formed review
Imagine a candle gift box whose front face is printed as one dark solid. The buyer likes the flat preview but later notices a visible difference when the face is upright on the formed sample. Retain both evidence IDs and the same face reference before changing the color or board.
The printer may need to clarify a process, substrate or finishing difference. Record the proposed explanation as a response requiring review, with any replacement evidence linked to the same panel. Your decision can then say which appearance is accepted and under what reference conditions.
Keep the printer response attached to the color decision
The color approval method names the physical reference and conditions. Use the sample revision record when a new solid-area sample replaces an earlier one.
The designer identifies the artwork area. The printer assesses the process-specific question and sends the agreed evidence. The buyer approves the named appearance reference or keeps a particular panel open. This assignment helps keep a general comment about color from spreading into unrelated structure changes.
Share the panel ID, substrate/process proposal and located observation through the packaging brief. MOQ is 500 pieces per design; printing, material, samples and commercial terms are confirmed for the project.
Check whether a proof represents the intended stock and finish together
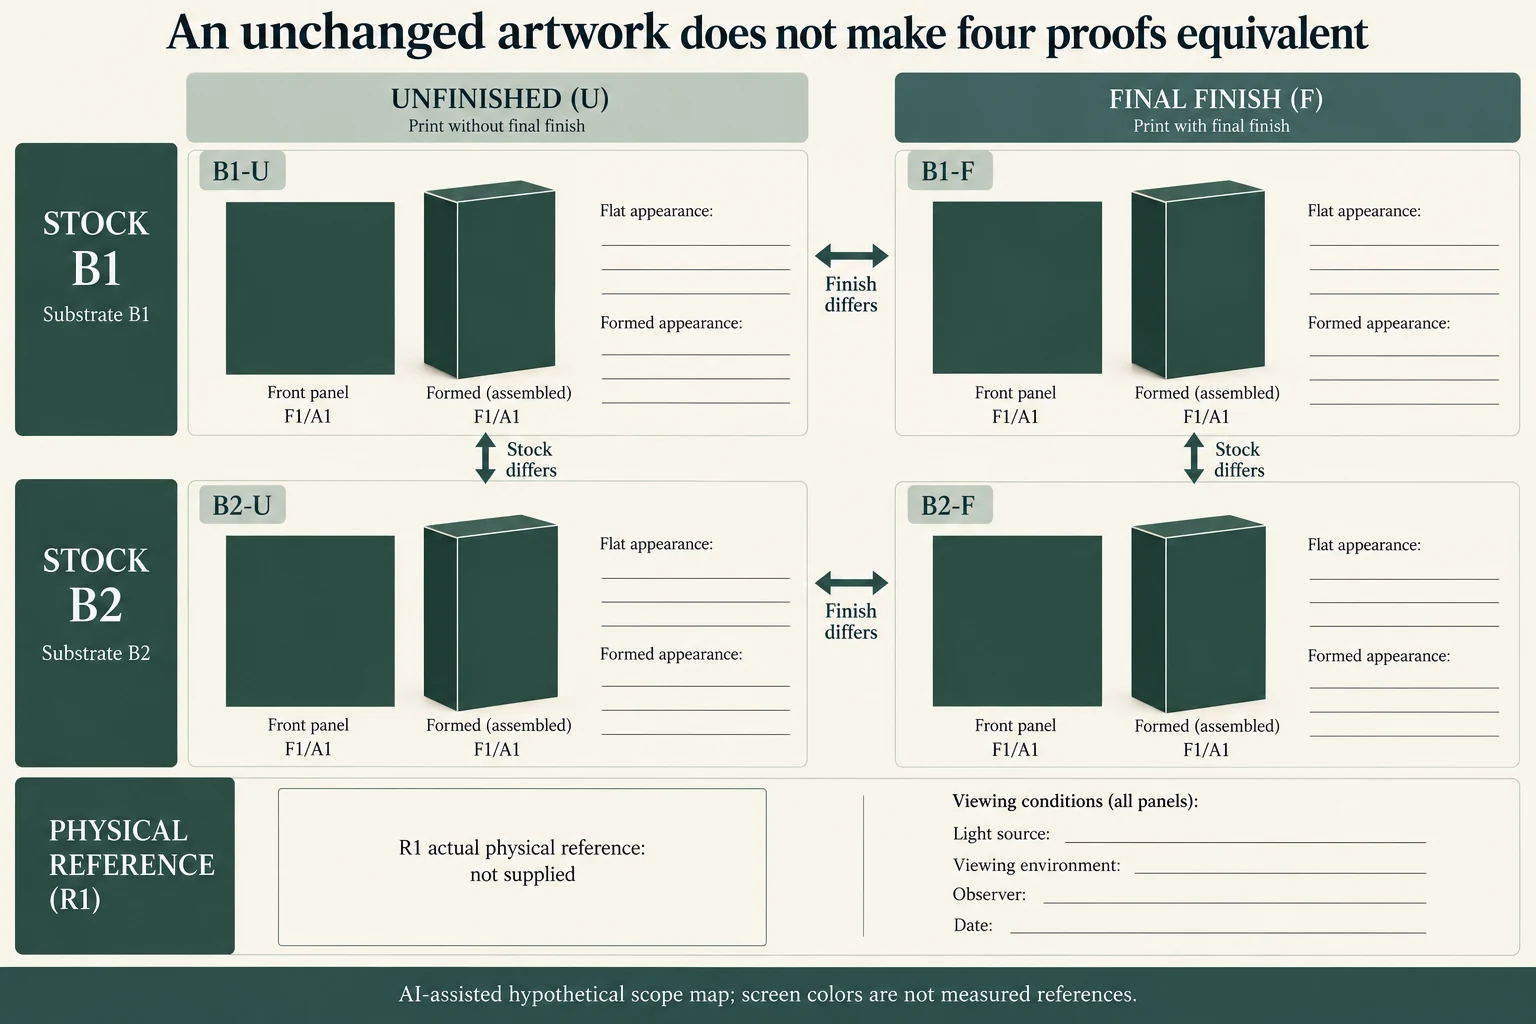
An unchanged artwork file does not make evidence interchangeable. Assume a fictional ART1 contains solid object A1 on front F1. Compare four explicitly named states: B1-U, B1-F, B2-U and B2-F, where B1/B2 are alternative stocks, U means unfinished and F means the proposed final finish. Those labels are scope identities, not actual material grades or observed print results.
Scroll horizontally if columns extend beyond the view.
| Hypothetical configuration | Named object | Relationship | Input or next scope |
|---|---|---|---|
| B1-U | B1-U | uses board | B1 |
| B1-U | B1-U | uses finish | U |
| B1-U | B1-U | uses artwork | ART1 |
| B1-F | B1-F | uses board | B1 |
| B1-F | B1-F | uses finish | F |
| B1-F | B1-F | uses artwork | ART1 |
| B2-U | B2-U | uses board | B2 |
| B2-U | B2-U | uses finish | U |
| B2-U | B2-U | uses artwork | ART1 |
| B2-F | B2-F | uses board | B2 |
| B2-F | B2-F | uses finish | F |
| B2-F | B2-F | uses artwork | ART1 |
If B1-F is the intended construction, a B1-U proof can show an unfinished state without settling the final finish's appearance. B2-F includes a finish but changes the substrate. B2-U changes both fields. Keep each flat and formed evidence request under its own configuration. This prevents someone from choosing a favorable flat view on one stock and a favorable formed view on another as though they represented one candidate.
State the purpose of each incoming item before comparison: position, color direction or final-panel appearance. Ask the printer to confirm the grade, process, color build and finish represented by that exact item. Then compare F1 in the agreed orientation beside the physical reference. A photographic difference can be documented without claiming an ink, substrate or finishing cause; those explanations need the printer's process-specific assessment.
The worksheet retains the original FP1/S1 example and its located right-side observation as a fictional record. It adds the four complete stock/finish configurations and separate flat/formed evidence rows, with no sample defaulted as accepted. The buyer's output is an evidence gap list for the selected state, not a ranking of screen greens. There is no invented uniformity tolerance, ink setting or promise that changing stock or finish improves the solid.
Download the large solid packaging print panel review record (.csv). It includes the original table fields and scenarios alongside the added relationships. HYPOTHETICAL rows are editorial examples or required review scopes, not actual records. Actual quantity, configuration, component and file identities, materials, process, specification, copy, method, condition, observation, owner, decision, evidence and dates are blank. ACTUAL_BLANK is a separate empty starting row; enter permitted project evidence before using an actual record. A blank means unknown.
Use the Packaging Color Approval Starts With a Physical Reference for its separate question. Use the Packaging Sample Revisions: Compare Versions Before Approval for its separate question.
References apply to the materials, processes or guidance named in each source. Worked configurations and dimensions are teaching examples, not tested specifications or production limits. Use the project’s material specification, drawing and formed sample for approval.
Discuss this packaging specification with Packrivo. We coordinate independent suppliers. MOQ: 500 pieces per product/design; illustrative quantities are not production offers. Confirm materials, samples, price and timing for your project.