
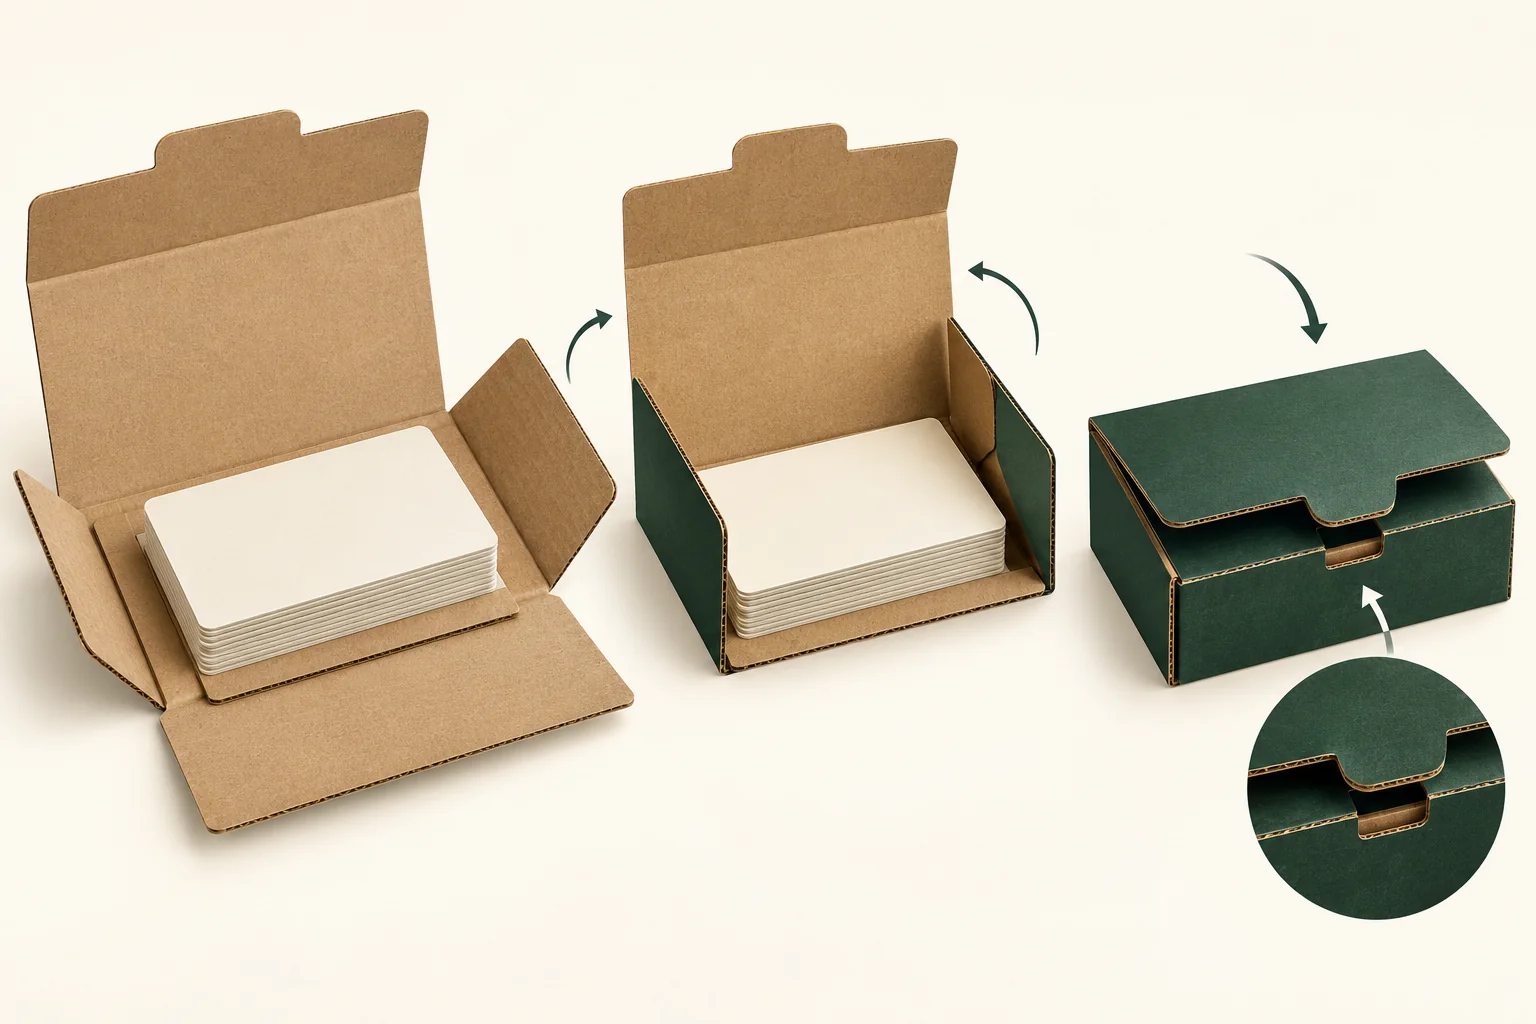
Use this concept to request the blank layout, named corrugated construction and marked lock features. Issue packing instructions against that supplier drawing and its sample, rather than against the illustration.
Place the product on the proposed wrap panel
The corrugated folder reference identifies the named option. It doesn’t specify your product’s wrapping geometry. Request the actual blank with the starting product position and the panels that fold around it.
Measure the complete packed envelope, including any backing card, inner wrap and projecting attachment. Mark a local high point separately from the main thickness. A product that appears flat from above can still leave a different fold question at one edge.
For a hypothetical gift print set, the folder could wrap a stack of cards on a backing board. Show the stack orientation and where the backing board ends. Review which panels move first instead of folding whichever edge is easiest during the trial.
Separate wrap formation from lock engagement
Identify every fold that encloses the product and the final locking features. Ask whether the lock enters from outside or through another receiving feature. Keep that route on the formed sketch.
Close the sample in the confirmed order. Pause before the last locking movement and photograph the contents inside the wrap. If the lock needs a change of grip or an extra fold, record that action rather than hiding it in a closed photo.
Opening deserves its own route. State whether the customer lifts a panel, releases a tab or performs another supplier-confirmed action. A folder that can be formed around the product may still leave the release point unclear.
Use a fold-and-lock record
Attach one working sketch and one sample revision to these fields. Replace the panel names with those used on the proposal.
| Part of route | Input to mark | Sample evidence |
|---|---|---|
| Starting panel | Product position and leading edge | Full contents before folding |
| Wrap folds | Named order and thickness relationship | Partly formed states |
| Lock entry | Tab and receiving feature | Position before and after engagement |
| Release | Customer grip and movement | Opened loaded folder |
| Edge contact | Named corner or panel | Located contact close-up |
Keep the corrugated grade and any print or lining attached to the sample record. If another material is used for an early model, name the substitution and retain the final-material question.
Compare the action with another outer pack
Use other mailer options if a formed cavity and separate loading step might suit the contents better. This folder’s distinctive task is forming around a named product envelope. The comparison should keep those contents fixed.
Record the supplied state, any prepared seam and who completes the lock. Ask how the folded pack is intended to be handled and whether another outer pack is part of the project. Fit observations should remain separate from any required distribution evaluation.
Send the complete wrap route
Bring the product envelope, fold map, lock question, quantity and destination to Get a Quote. The minimum is 500 pieces per design. The actual construction, material, sample scope, price and timing are confirmed against the project brief.