
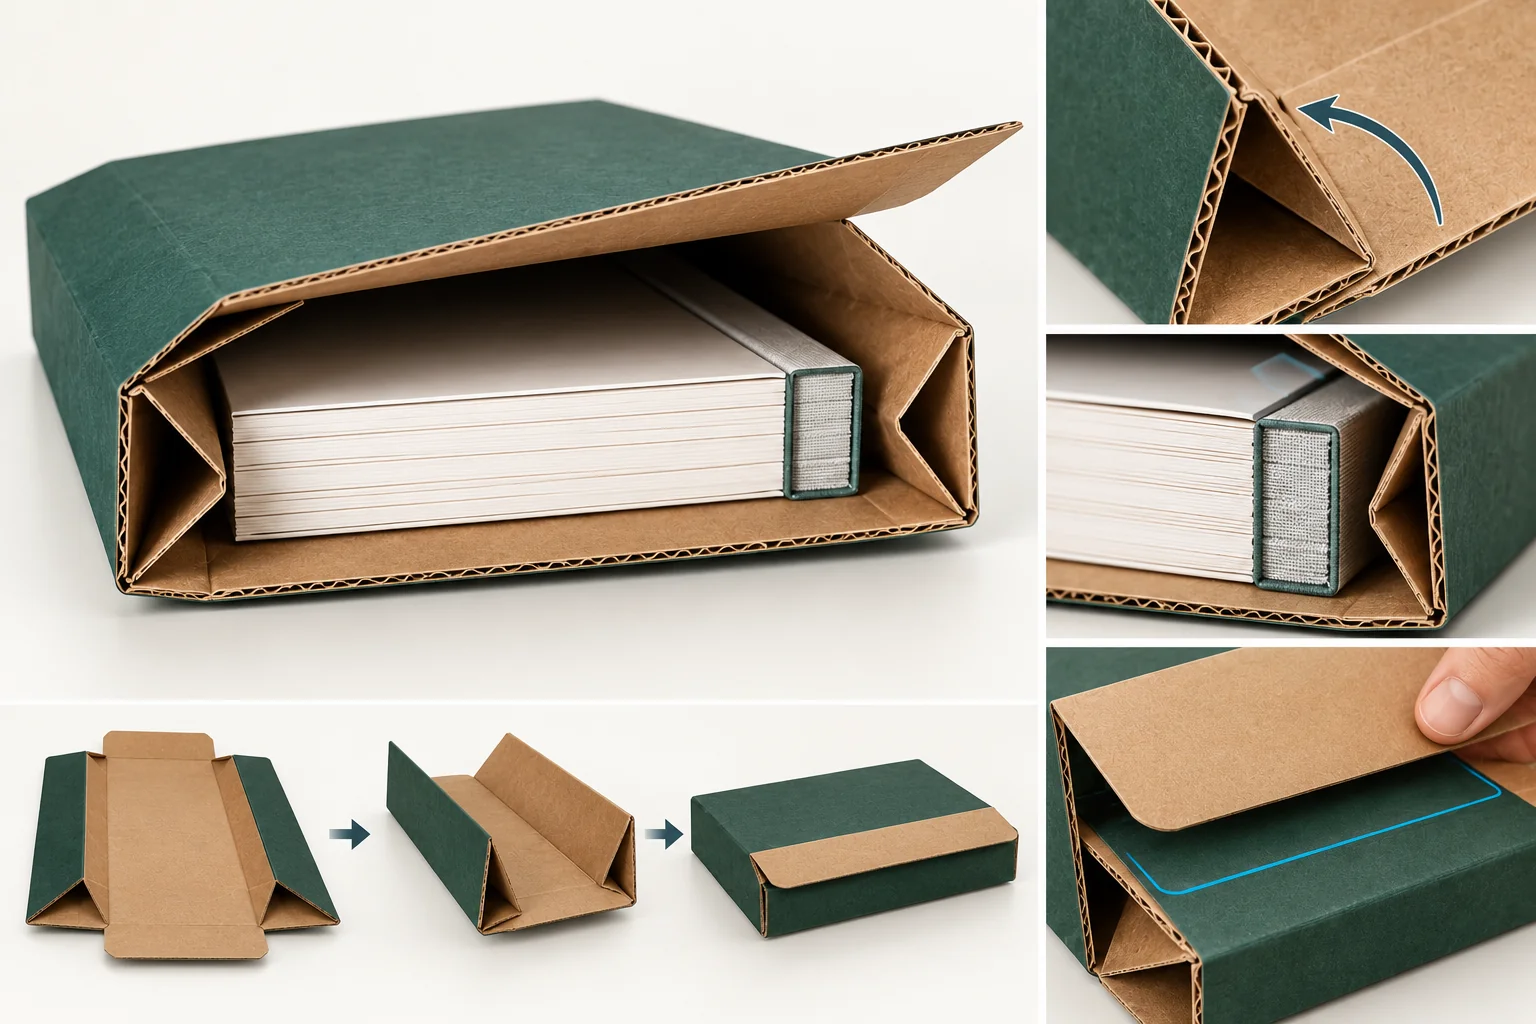
This packaging concept prepares a supplier discussion. The proposed board construction, fold pattern and closing method need a drawing and an identified material sample.
Locate the corrugated section on the fold map
The corrugated gusset folder catalogue identifies the format. Use it as a starting option, then request the supplier’s actual board section, gusset positions and joining proposal. The catalog name does not provide your project-specific crease recipe or closure allowance.
Mark the flute direction on the blank beside each named gusset fold. Ask which folds run along that direction and which cross it. Keep the proposed crease treatment with that map so the sample reviewer can identify the actual material and forming action rather than comparing two unexplained folded shapes.
Name the complete thinner and thicker bundles. Include backing, wrap and local high points. For a hypothetical print gift, the thicker bundle adds a booklet; mark its spine beside the relevant gusset instead of recording only a maximum stack thickness.
Separate fit from the outer-pack closing job
The paperboard gusset folder tool asks how a contents stack meets side folds and a lock. Here, the packing instruction must also identify the corrugated section at those folds, stacked board layers around the edges and the surface available for the outer-pack joint. Those fields can change which panel is formed first, where an edge is enclosed and where the packer applies the agreed closure.
Confirm the actual outer-pack closing method before carrying over a paperboard folder’s packing action. A gusset accommodates the bundle; the specified outer-pack joint closes it. Mark them separately, even when the same panel participates in both actions.
Complete a corrugated fold-and-joint map
Use one drawing revision and actual material identity throughout the record. Replace the example references with your own marked views.
| Relationship | Input to mark | Sample evidence |
|---|---|---|
| Flute direction at gussets | Direction arrow and fold IDs G1/G2 | Flat blank and formed views showing the same folds |
| Board build-up | Overlapping layers beside each bundle edge | Located side section at the booklet spine and corners |
| Edge enclosure | Which panel covers each packed edge; exposed cut edges | Loaded views before final joining |
| Joining or seal surface | Actual method, receiving face and overlap proposed | Surface available after each named fill is wrapped |
| Delivered state | Flat or prepared folds; completed seams and loose parts | Received configuration beside the forming instruction |
| Bundle comparison | Complete thin/thick contents and high-point positions | Repeat fold, edge and closing views without changing orientation |
For the hypothetical booklet bundle, call the spine edge E1 and closing face J1. If forming the adjacent gusset changes the overlap at J1, ask for that relationship to be reviewed on the drawing. Pulling the folder tighter without recording the action would leave the instruction incomplete.
Check the actual folding and joining sequence
Start with the sample as delivered. Identify every prepared seam and the work left to the packer. Match the flute arrow and fold IDs to the sample before forming the gussets. Record any visible fold or liner change at the named location; leave the cause for the responsible structural review.
Load each bundle and inspect the board build-up and enclosure at the same edges. Photograph those locations while the final joint is still open. Then record how the proposed closing surface is reached and joined, followed by the customer’s release and removal route.
Keep these observations separate from a transit or protection evaluation. Compare other outer-pack options if a fixed cavity or another packing process is needed.
Send the fold map with the packed edges
Send the board section request, flute/fold map, edge views, joining proposal, delivered state, quantity and destination through Get a Quote. The minimum is 500 pieces per design. Final construction, samples and commercial terms require project confirmation.