
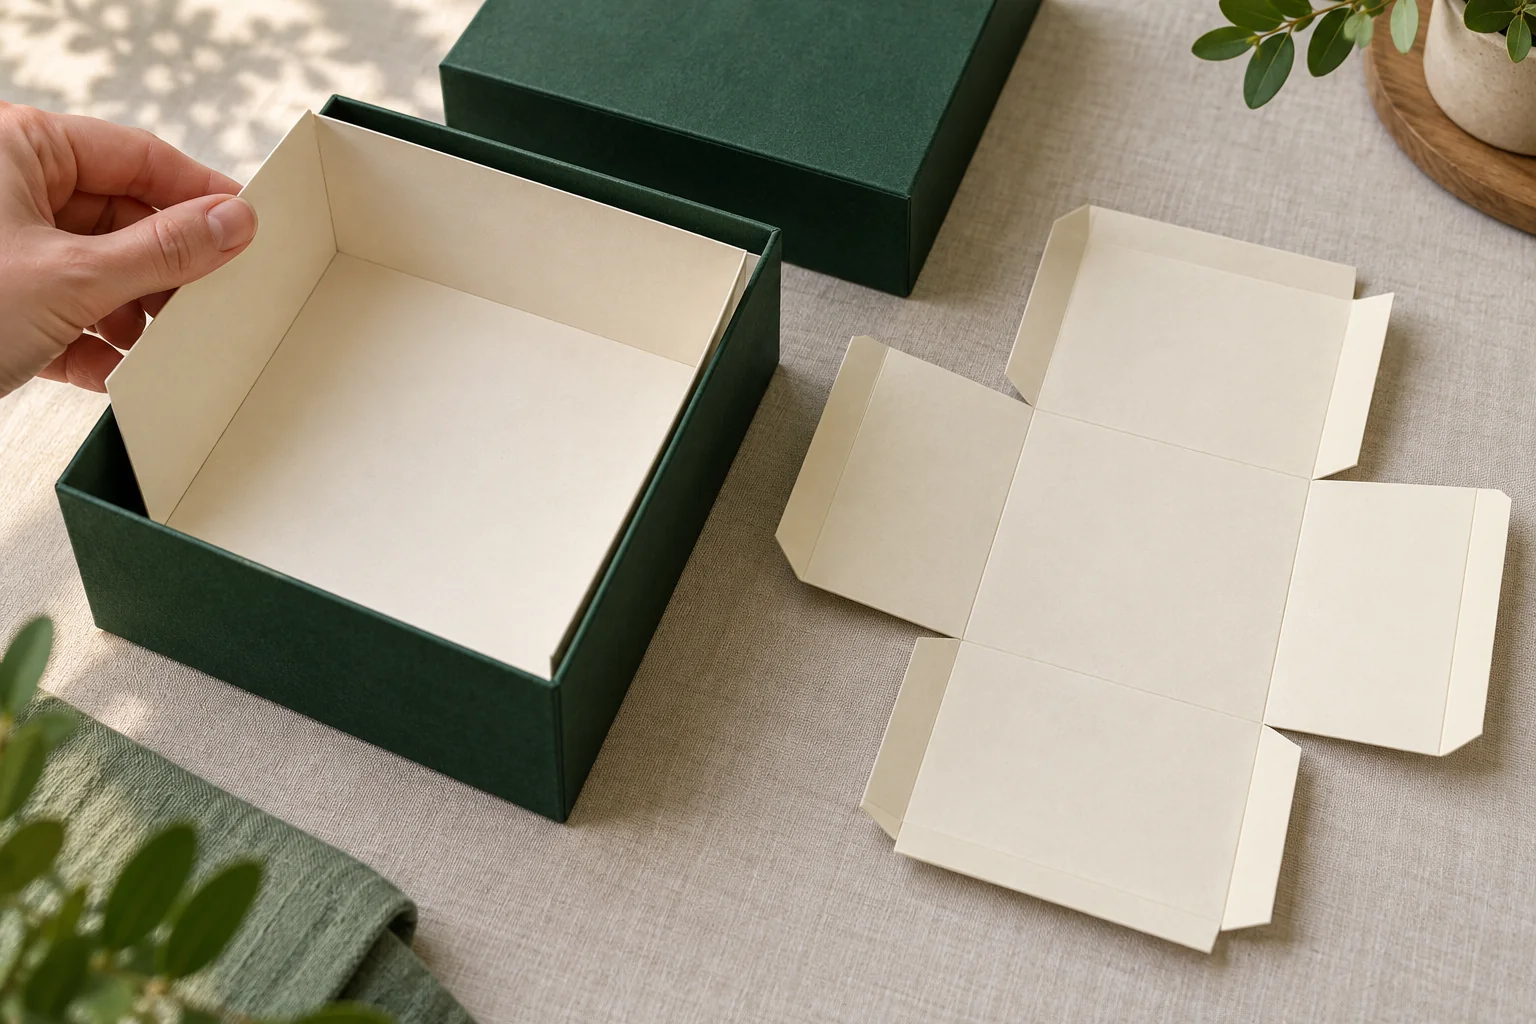
Concept / packaging option. AI-assisted visuals explain the structure; final materials, production details and sample scope are agreed for the project.
Give the liner a defined area
Show which surfaces the proposed liner covers: side walls, a base, selected corners or another stated area. Identify the interfaces where it meets the outer box or another component. A liner may reduce the usable space, so its formed condition belongs in the interior measurement discussion.
Ask for the unfolded and formed views together. Fold tabs, seams and overlaps can change the local surface and the space available to load the product. Describe how the liner is retained, including whether the proposed construction simply rests in the enclosure or uses a specific attachment.
Mark the liner’s starting orientation in the loading instructions. A rotated part can put a seam against a different product surface.
Keep the intended contact conditions visible. The product might have a sensitive finish, a projecting part or an existing retail cover. Name the surface that may touch the liner and the material information the supplier needs to address. The word “paper” does not settle contact suitability or a product-specific protection requirement.
Separate lining from locating
A paperboard holder can create cutouts or supports to position the contents. A liner introduces a different task: covering a defined area around them. An internal divider separates multiple items. Choose by the required contact and movement, and combine components only when their jobs are clear.
For an illustrative candle carton, a wall liner could be considered alongside a base support. The support determines how the vessel sits; the liner affects its relationship to the enclosure. Review their combined thickness, contact and removal rather than accepting them as two unrelated accessories.
Prepare a coverage and loading record
| Field | Describe the liner in use |
|---|---|
| Outer box | Current construction, usable interior and closure. |
| Coverage | Walls or surfaces lined, open areas and the purpose of each covered area. |
| Construction | Material proposal, folds, seams, overlaps and retention method. |
| Product | Geometry, finish sensitivities and named contact surfaces. |
| Operations | Liner assembly, product loading and customer removal sequence. |
| Project | Component quantities, destination, drawing versions and sample scope. |
Keep artwork instructions tied to the surfaces that remain visible after forming. If the liner is printed, identify which folds and overlaps cover part of the graphic. A layout that looks correct while flat can present a different image inside the loaded carton.
Review the lined enclosure as one configuration
- Form the liner and place it in the proposed outer box.
- Inspect folds, retention and all changes to the usable interior.
- Load the actual product and any separate supports.
- Close the pack and inspect contact or interference with the lid.
- Open the pack and remove the product by hand.
- Record the contact observations and agreed next review.
If the liner shifts, bunches or prevents closure, identify the affected fold, attachment or measurement. The sample revision record keeps that issue linked to the box and liner versions. A later holder change can reopen the same contact question.
Agree component scope and quantity
Packrivo’s order planning policy is 500 pieces per product / design. List the liner, enclosure and any holder separately, with their quantities and sample tasks. Final material, construction, pricing, production conditions and delivery timing are reviewed for the project.
The original box-liner structural reference distinguishes a wall-lining component from cavity-level holders. Its specifications and performance descriptions remain specific to that source.
Get a Quote showing the surfaces and loading sequence. Packrivo helps connect the liner proposal to the product-contact and sample questions you need answered.