
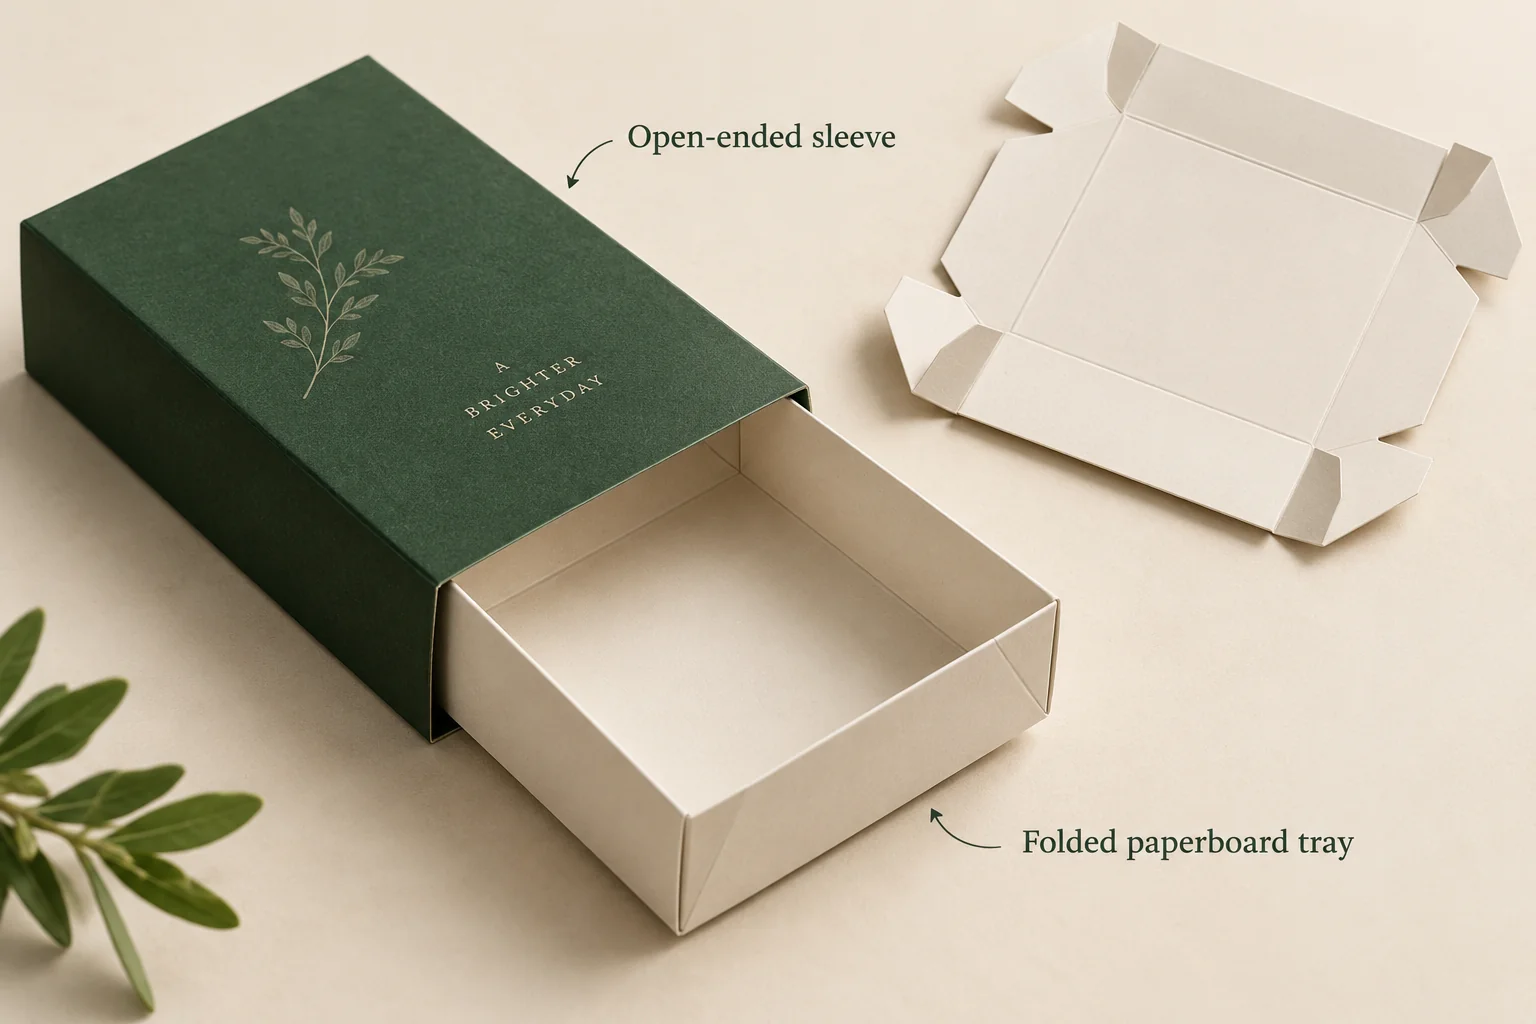
Concept / packaging option. AI-assisted visuals explain the structure; final materials, production details and sample scope are agreed for the project.
Separate the two pieces and their jobs
The tray holds the contents and provides the surface from which they are removed. The sleeve surrounds that tray and establishes its opening path. Each piece has its own fold pattern, seam and artwork surfaces. Ask for the proposed construction of both, including whether the tray uses locking corners, glued parts or an additional holder.
Describe the loaded arrangement before discussing sleeve dimensions. Jewelry cards, small accessories and folded tissue can sit above the tray edge or catch at its entrance. Name the highest item and the surfaces that may touch the sleeve. The useful check is the assembled and loaded combination, rather than the tray and sleeve measured independently.
Choose how the user starts the movement: a thumb opening, a pull detail or access to an exposed tray edge. Indicate whether the tray should slide out fully. A stop, if proposed, needs its own explanation and review; it should not be inferred from a rendered picture.
Compare folded and rigid drawer construction
A rigid drawer jewelry box and a folding tray-and-sleeve option may share an opening idea but have different component construction and preparation tasks. Compare the actual supplied state, corner formation, tray wall build and remaining local work. Those are more useful distinctions than a blanket claim that one version is cheaper or stronger.
For an illustrative gift with a necklace card and a separate pouch, the packing team must know whether the card loads before the tray is closed and whether the pouch stays below its rim. That sequence can change both the holder and the sleeve clearance. Capture the sequence while the layout is still being discussed.
State what arrives at the packing bench
| Brief field | Record before comparing proposals |
|---|---|
| Tray | Formed usable space, wall construction, corner locks and loading order. |
| Sleeve | Inner opening, seam position, print faces and starting grip. |
| Supply state | Flat, partly formed or assembled for each component. |
| Assembly | Who folds, locks, glues, loads and checks the complete pack. |
| Additional parts | Holder, card, pouch or tissue with separate quantities. |
| Project | Design quantities, destination, artwork versions and open questions. |
Use the flat and assembled delivery worksheet to compare the same completed pack. Include local consumables and storage requirements in the questions. A flat drawing describes the proposed construction; it does not supply a measured assembly time or freight saving.
Check folds, loading and travel together
- Assemble the supplied pieces using the proposed instructions.
- Check that corners and seams reach their intended positions.
- Load all contents, including the holder and printed extras.
- Slide the loaded tray, checking contact at the entrance and along the travel.
- Remove the gift by hand and inspect the fold and contact areas.
- Record which drawing and sample versions were reviewed.
If a change is needed, identify whether it belongs to the tray, sleeve or packed contents. Widening the sleeve might alter the closed appearance; changing the tray might affect its holder. Keep those linked consequences visible before accepting the next revision.
Prepare a project-specific proposal
Packrivo’s order planning policy is 500 pieces per product / design. Ask for the tray, sleeve, holder, print work and sampling to be described as separate scope items. Final material construction, pricing, production conditions and delivery timing are agreed for the reviewed configuration.
The original tray-and-sleeve structural reference shows why a folding version introduces assembly work. Its commercial terms and material specifications are not transferred to this option.
Get a Quote with the loaded layout and preferred supplied state. Packrivo helps organize the component questions so the next sample checks the combination you intend to use.