
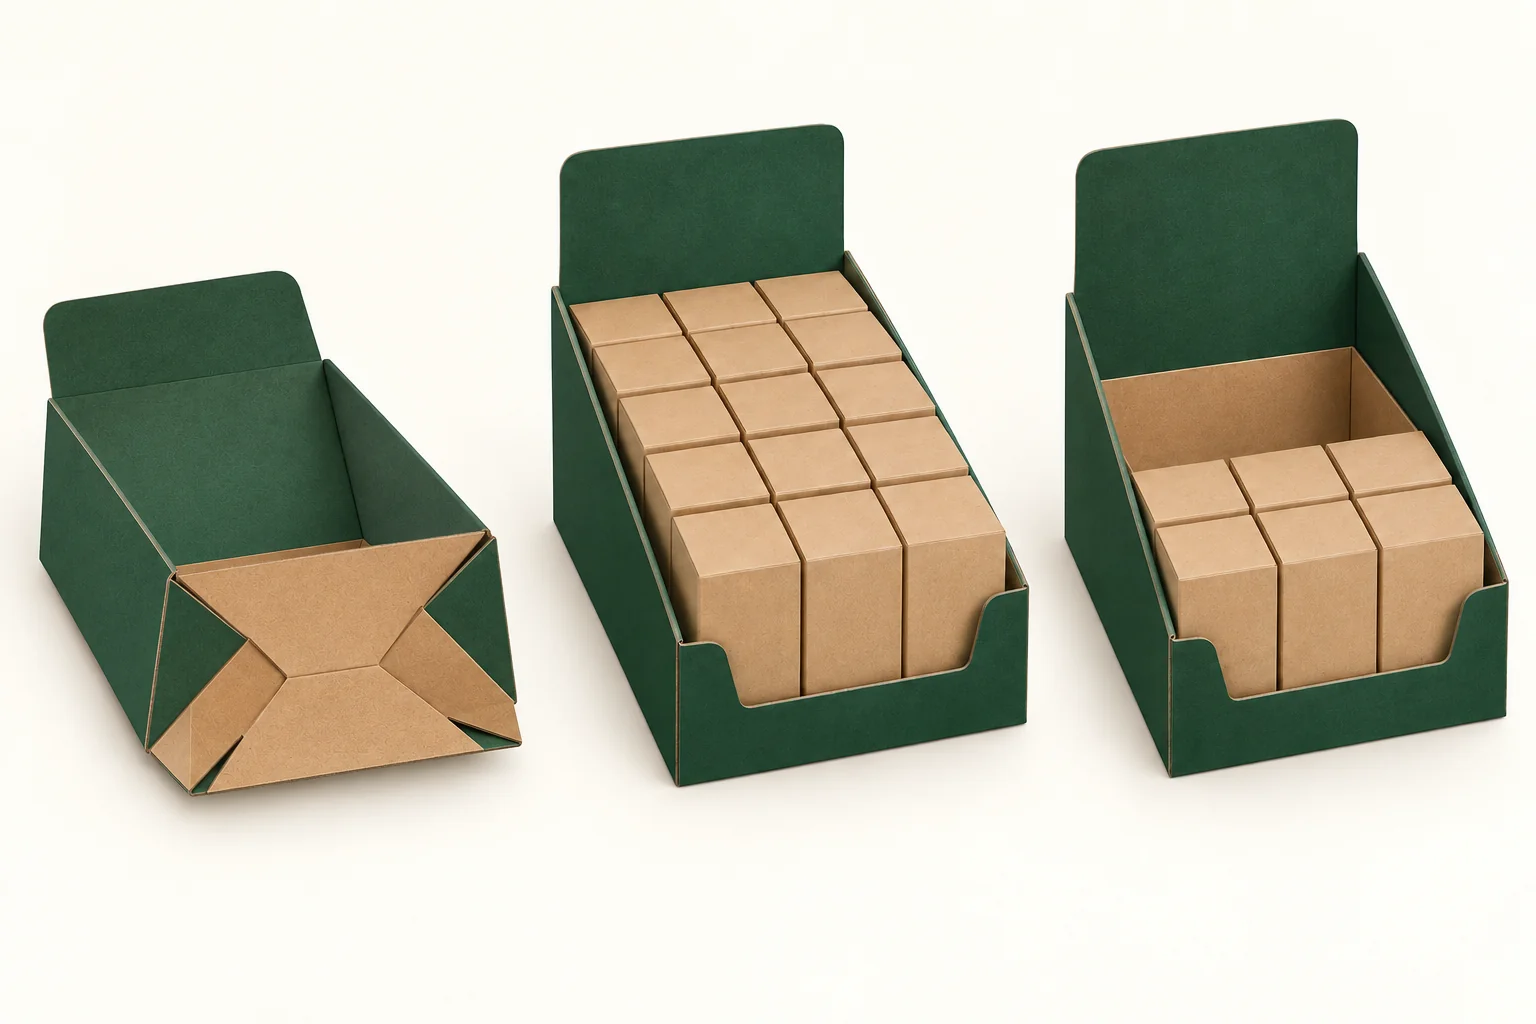
This packaging option combines a display opening with a prepared base. Keep those two jobs separate in the drawing and sample record. Staff form the carton; customers remove units later under a different load arrangement.
Show the prepared base in motion
The auto bottom display catalogue describes pre-glued flaps that form the bottom. Request the supplier’s base drawing and setup demonstration for the proposed version. Do not infer the actual joints from a closed display photograph.
Ask for a sample in its delivered state. Open the carton as instructed and view the base before placing anything inside. Photograph the final base position from below and from the inside, where safe and practical.
Record any separate pressing or alignment step. If the proposed preparation changes, update the packing instruction rather than continuing to call two different operations the same setup.
Use the retail units as a defined load
Provide the number, dimensions and weight of the actual sale-ready units. If their weight is unknown, mark it as missing. A display filled with empty dummy cartons can help review layout, but it cannot stand in for a loaded-base evaluation.
A hypothetical tray of small gift boxes may be full when placed on a counter and half full later. Check the front cutout and remaining rows in both states. Staff should know whether units are moved forwards or remain in their original positions.
The four corner display tray focuses on prepared corners and front access. Compare it here by setup action and proposed base construction, without assigning a strength ranking from the format name.
Record base setup and display use separately
Start each comparison with the same sample revision and unit configuration. Keep setup observations apart from access observations.
| Stage | Required view | Record |
|---|---|---|
| Supplied | Prepared flat structure | Which joints arrive completed |
| Formed empty | Bottom inside and underneath | Final flap positions and extra actions |
| Full display | Front and side with actual units | Base shape and front-row grip |
| Half full | Same views with fewer units | Remaining layout and removal action |
If the base moves during a removal action, record when and where. A description such as ‘center flap moved while front unit was lifted’ is more useful than a general request for a stronger box.
Specify the supplied state and evaluation scope
Confirm who sets up the carton, loads units and prepares any display cutout. Agree whether inserts or dividers are separate pieces. The delivery-state guide helps name those responsibilities.
Board grade, caliper, flute where relevant and base preparation belong in the proposal. Ask the responsible supplier to define any required load or handling evaluation. The fit and access record on this page is an editorial review method, not a test standard.
Check printing after the carton is formed. Any display panel that changes position during setup should be reviewed in its final retail state before artwork approval.
Keep any partial-load arrangement deliberate. ‘Half full’ should describe which rows remain, not simply half the initial unit count placed wherever convenient. Photograph that starting pattern and ask whether staff must move units forwards. This gives the base and access review one repeatable configuration without turning a casual trial into a capacity claim.
Send setup evidence with the unit layout
Use Get a Quote to send supplied and formed views, actual unit details, display layout, quantity and destination. The minimum is 500 pieces per design. Final components, sample work, price and timing require project confirmation.