
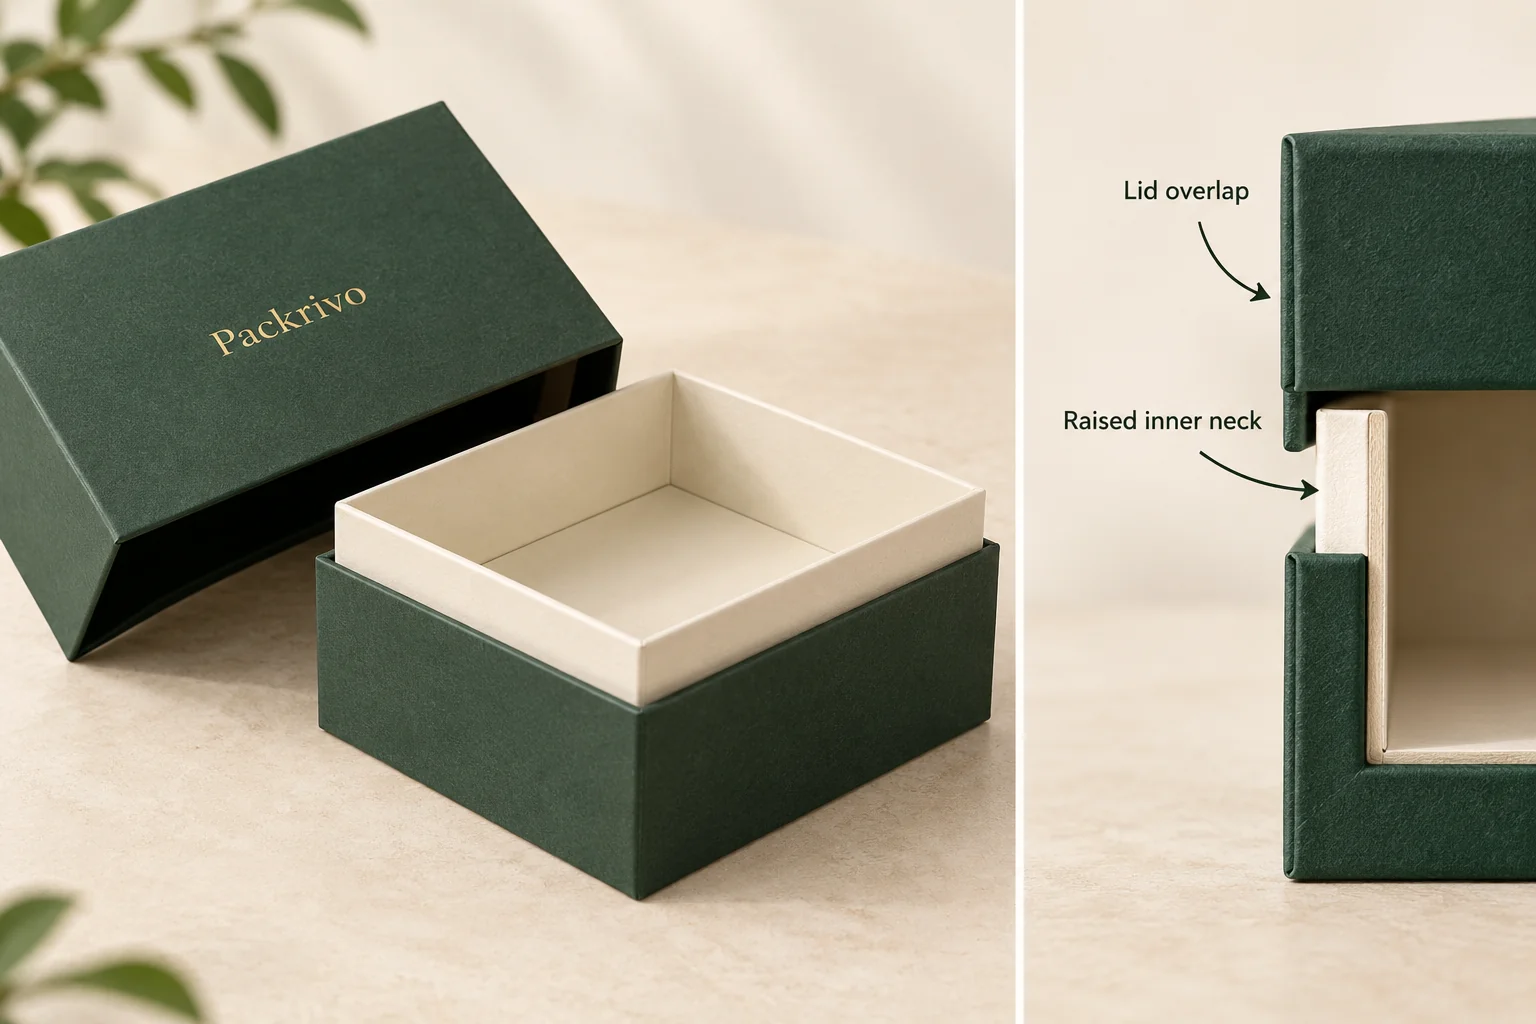
Concept / packaging option. AI-assisted visuals explain the structure; final materials, production details and sample scope are agreed for the project.
Locate the lid against the neck
The inner neck introduces a second reference inside the outer shell. Its exposed height, the lid depth and the position of the contents all affect what the customer sees after lifting the lid. Ask for a section drawing showing which surface stops the lid, where the lid overlaps the neck and how the base supports the product. A view of the exterior alone leaves those relationships unclear.
Describe whether the closed lid should cover the neck completely or leave part visible. Then identify the product’s highest point, including clasps, lids, bows or a folded care card. Keep that height separate from the box’s exterior height. A holder that raises the product can change lid clearance even when the outer dimensions stay the same.
Include the inside wrapping and seams in the drawing discussion. Paper, lining and folded edges occupy space at the lid interface. Their proposed construction belongs in the fit review before the final artwork is positioned on the shell.
Choose the opening around the product
Compare this structure with a simple lid-and-base jewelry box when you mainly need a separate cover. The shoulder and neck adds an internal interface to specify. A hinged format creates a different opening path and needs room behind the lid; a drawer requires room in front for the tray to travel.
Think through the first action after the lid is removed. Can the customer lift a candle vessel directly, reach a jewelry pull point or remove an entire holder? A close-fitting neck may affect finger access. Describe the intended movement, rather than asking for a box that simply looks tight. For a set, identify which piece is removed first and where the remaining pieces stay.
Build a section-based brief
| Field | What to record |
|---|---|
| Contents | Each item, weight, display orientation and projecting parts. |
| Base and neck | Usable interior, neck position, exposed height and contact surfaces. |
| Lid | Depth, overlap, stopping surface and preferred removal movement. |
| Holder | Support height, cavity layout, removal point and attachment method. |
| Presentation | Inside and outside artwork, wrapping seams and intended finish areas. |
| Project | Quantity by design, destination, packing state and the decisions still open. |
Use the dimension and acceptance method worksheet to name each critical feature. Have the responsible parties agree how the neck, lid and product space will be measured. Proposed dimensions can start the discussion, but they should remain identified as estimates until reviewed.
Review the sample as a sequence
- Place the complete product and proposed holder in the base.
- Lower and lift the lid without using the product to push it into place.
- Inspect alignment, neck exposure, stopping position and the customer grip.
- Remove the product in the intended sequence and examine contact areas.
- Repeat the opening, then record the version and any change requested.
For an illustrative necklace set, a care card placed above the jewelry could change the lid decision. Reviewing the empty shell would miss that interaction. Keep the card, holder and jewelry in the configuration used for approval, and describe a correction by its affected feature rather than saying the box feels wrong.
Plan quantity and the next decision
Packrivo’s order planning policy is 500 pieces per product / design. Separate the shell, holder and any additional components in the proposal, with their quantities and sample work identified. Project materials, pricing, production conditions and delivery timing are confirmed against the agreed specification.
The manufacturer’s shoulder and neck reference illustrates the additional internal board interface. It supports the structural distinction, rather than a Packrivo performance or supply claim.
Get a Quote with the product layout and the opening you want. Packrivo can help organize the section questions, compare the replies and define what the next sample needs to resolve.